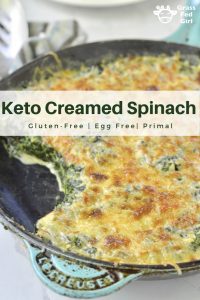
Keto Creamed Spinach Recipe My husband taught me how to make this keto creamed spinach recipe a few years ago. I wanted to put it on my blog for a while but I didn’t get a good picture until yesterday when I made this for an Easter get together. This keto creamed spinach recipe is…
Keto Roasted Cauliflower and Bacon Recipe
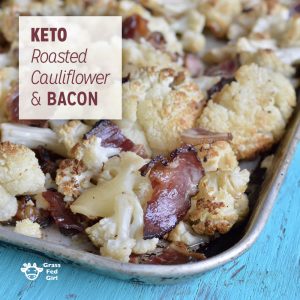
Keto Roasted Cauliflower and Bacon – Keto Roasted Cauliflower and Bacon Recipe This Keto Roasted Cauliflower and Bacon is so simple and delicious way to eat more cauliflower. The naturally sweet flavor of roasted cauliflower and the crisp crunch of bacon makes a great low carb and ketogenic snack or side dish. Its rich flavor will…
Primal, Gaps, and Low Carb Cauliflower Macaroni and Cheese Recipe

Low Carb Cauliflower Macaroni and Cheese Recipe has everything I have been looking for. I have been experimenting with adding some high-quality dairy in my diet lately. It has been working pretty well. I don’t seem to do well with yogurt but cheese and heavy cream have been going down rather well. I always look for…
Keto Bacon and Brussels Sprouts
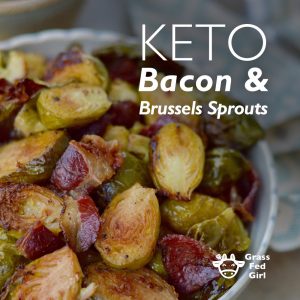
Keto Brussels Sprouts and Bacon Recipe I made this keto brussels sprouts and bacon recipe with some pastured beef bacon that I bought from Porter Road Butcher in East Nashville, TN. I love that place because all the meats are local and less processed than grocery store meat. The bacon fat will help the Brussels…
Resistant Starch Potato Salad Recipe
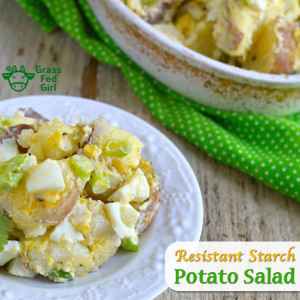
I wanted to share this recipe I made recently that was very well received by my family. I brought home some of the new Primal Kitchen Mayo from Paleo FX. The eggs are organic and it is made from Avocado oil. Many people don’t like making their own mayo so they end up buying the…
Paleo Roasted Brussels Sprouts Almondine with Dried Cranberries Recipe
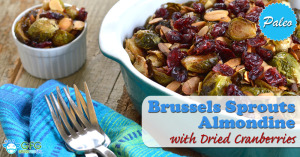
I love Brussels sprouts and I never get enough of them. I love to cut them in half so they get crispy on the flat side which makes them taste like fries. It is important to cook them in a healthy cooking fat that won’t burn. See my healthy cooking fats guide here. The…
Paleo Spiced Sweet Potato Mash Recipe
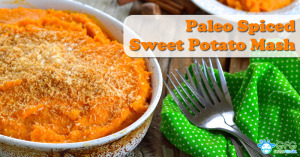
I made this recipe for a holiday family dinner and it got rave reviews from my sister and parents. It is naturally tangy with a slightly spicy kick from the parsnips and ginger. The toasted coconut gives it a bit of texture and the ghee makes it nutty and creamy. Your family will love this…
Best Savory Lower Carb Paleo Stuffing Recipe (gluten-free, grain-free and dairy free)
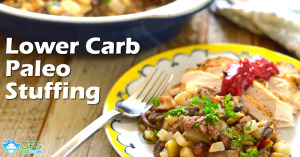
I wanted to make a stuffing that was grain free but full of flavor. I also don’t feel well when I eat a lot of carbs so I wanted to make one lower in starch. This is the best Paleo has a lot of ingredients but it is worth the trouble and the best part…
Easy Autoimmune Paleo Coleslaw (low carb, gluten free, grain free, dairy free)
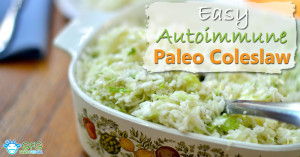
Easy Autoimmune Paleo Coleslaw – Since June 10, 2014 I have been doing the autoimmune protocol which makes it 2 months. I made this coleslaw for a July 4th barbeque which was a big family gathering. This coleslaw was put out with all the rest of the food and everyone ate it without noticing that…
Easy Paleo and Dairy Free Falafel (low carb, grain free, Gaps)

Easy Paleo and Dairy Free Falafel – I guest posted on my friend Heather from the Mommypotamus’s blog with a recipe from my new book that was so delicious!! Do you love falafel from a Mediterranean restaurant? That warm hush puppy taste steaming right out of the fryer is to die for!! Do you love…
Money Saving Idea for Using and Storing Fresh Herbs
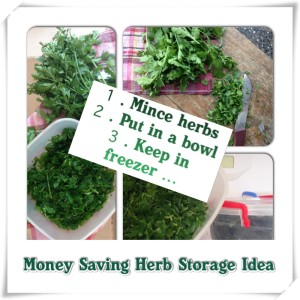
Recently I stayed with my mother in law for two weeks in Algiers, Algeria. She sure knows her way around the kitchen and I learned a lot from her (more to come). She had 9 kids and cooked from scratch for them everyday. She can take the simplest ingredients and make them takes like heaven….
Grain Free Holiday Stuffing
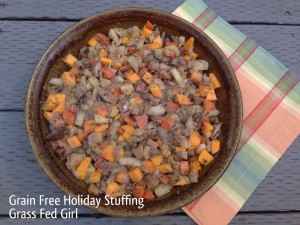
Grain Free Holiday Stuffing – Grain Free Holiday Stuffing Serves 4 Ingredients: (always use organic if possible) 1 tbsp of Grassfed Organic Ghee or duck fat 1 cup of chopped and cleaned leeks 1 bulb of fennel, diced 1 cup diced carrots 8 diced crimini mushrooms 1 peeled and diced turnip 1 peeled and diced…
Paleo Beef Stew With Celery Root Puree
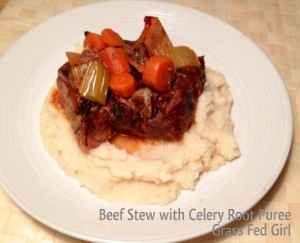
Paleo Beef Stew With Celery Root Puree – Paleo Beef Stew With Celery Root Puree Ingredients: 1 batch of my grass fed beef stew crock pot recipe 2 large celery roots 1 tsp Seasonello 2 tbsp grass fed butter or Grassfed Ghee 1 tbsp fresh parsley 1 tsp Real Salt Directions: Make the beef stew…
Mock Mashed Potato Recipe
Mock Mashed Potato Recipe – Mock Mashed Potato Recipe Ingredients: 2 large organic turnips (Optional) 1 head organic cauliflower Fresh sage Sea salt (to taste) Fresh ground pepper (to taste) 1/2 cup Coconut Milk OR 3 Tbsp grass fed butter 1/4 cup fresh chopped chives or parsley Directions: Peel and boil turnips until soft. Steam…
Low Carb, Keto Green Bean Casserole (Egg Free, Grain Free, Dairy Free)
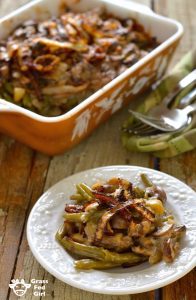
Keto Green Bean Casserole – Low Carb Keto Green Bean Casserole This paleo low carb and keto green bean casserole recipe is good for people who are have a sensitivity to gluten, dairy and carbohydrates. Always use the highest quality organic ingredients you can find. I made it several times for holiday parties and it…